As an owner of a business website, nothing is more terrifying than seeing all the work that you’ve put into building your site gets destroyed by nefarious hackers.
So how do you protect all those hours that you’ve worked on your website (and your brand)?
It’s simple – you keep hackers at bay by using easy hacker protection tips.
While nothing is uncrackable in the hands of a skilled hacker, these methods will serve well as a deterrence to make them think twice.
This article will also show you how to check if your website is safe and what you can do to ensure your site doesn’t become an easy target for malicious hackers.
On top of backing up your files regularly, (which you should already be doing, for many various reasons), taking the following steps will beef up your website security up several notches.
Step #1: Install security plugins on your website
Once you’ve everything running on your site is up to date, you should always enhance your website’s security even further using security plugins.
These plugins actively prevent any website hacking attempts.
If you’re operating a WordPress website, you’ll want to look into a couple of security plugins that are free-of-charge, such as iThemes Security and Bulletproof Security (or any other similar tools that are available for sites that are built on other content management systems).
With these security plugins installed, you will plug the security loopholes that are inherent in WordPress, putting an end to any potential hacking attempts that could harm your site.
If you’re running a CMS-managed site or HTML pages, you can check out website security monitoring tools that are available, such as Sucuri or Monitis.
These tools don’t just plug site security loopholes. They go above and beyond that by offering daily monitoring, such as for malware detection, vulnerability identification to active virus scanning and much more.
If your business depends heavily on your website for revenue, then a website monitoring tool is definitely a worthwhile investment.
Step #2: Switch to HTTPS
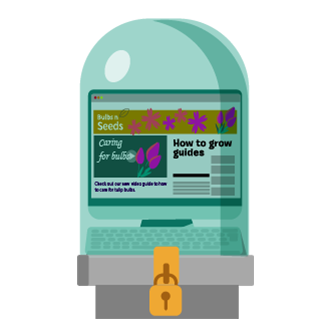
HTTPS has become a must-have for every website nowadays.
Your website users are always looking out for the padlock before they provide sensitive details. Most modern browsers like Chrome and Firefox explicitly flag websites that provide forms on pages without HTTPS as being an unsecured risk.
Even Google sees HTTPS an SEO ranking factor because of its impact on privacy for web users.
Hence, having an HTTPS site is essential to any business website. If you provide a secured environment for your users, they can quickly place your trust with your business.
They know that to recognise these five little letters is an indication of protected privacy and that it’s safe for them to provide financial information on an HTTPS website.
Since July 2018, Google Chrome actively alerts visitors if any website doesn’t carry an SSL certificate.
An SSL certificate is vital because it secures the transfer of online information – such as credit cards, personal data, and email addresses between your website and the server.
Google is taking a strong stance towards website security now because they want their users to have a positive and secure experience while browsing the web.
If you operate an online business, especially if you run a web store, you’ll need to invest in an SSL certificate.
The cost of an SSL certificate is low, but the extra level of encryption it provides for your customers goes a long way to making your business more trustworthy.
Most major web hosting solutions come with a free SSL certificate. Check with your provider for more details.
If your web host comes with a free SSL certificate, it’s usually applied automatically to your hosting account. You’ll just need to install it on your website.
Step #3: Keep your website software updated
One of the simplest ways to protect your website from any hacking attempts is to make sure your content management system, including all plugins, apps, and scripts you’ve installed is the latest version.
That’s because a majority of these tools are open-source software programs. This means that their code is easily accessible to both well-intentioned software developers as well as evil hackers.
Hackers can go over the code, looking for security vulnerabilities inside the software that allow them to hijack your website by exploiting any inherent weaknesses.
If your website is built on WordPress, both your base WordPress installation and any other third-party plugins you’ve installed are potentially susceptible to these types of online attacks.
With the newest versions of your platform and scripts installed, you can minimise the risk that you’ll be hacked through software exploits. Best of all, it usually takes a click or two to do.
On WordPress, you can check this quickly whenever you log in to their WordPress dashboard. Beside your site’s name, you will see an update icon. Click on the number to access your WordPress Updates.
Step #4: Set up secured passwords
This is another quick yet quintessential way to keep your website safe, but it’s often the most overlooked.
With so many things going on in our lives, it’s often tempting to just stick with a password you know you’ll always be remembering, such as your birthday or your mother’s maiden name.
But understand this, hackers today have access to a wealth of private data. Names, addresses, contact information and more are easily accessible to places like social media.
That’s why you have to do better than a generic password – they can be easily guessed or even cracked by determined hackers.
So make an effort and set up a truly secure password. Make sure the password is long, containing 8 or more characters.
Also, make use of upper or lower cases, numbers, and special characters such as hyphens or underscores. When you combine these things in your password, it makes it much harder for password cracking software to figure out your password.
And finally, always steer clear of words and names that are easy to guess, such as your kid’s birthday or your dog’s name.
If you have a problem coming up with a secure password, you can use any of the free password generators available online, such as LastPass.
Password security applies to not only yourself, but to anyone who has access to your websites, such as administrators or your website members.
To keep their logins secure, you’ll want to ensure everyone who has access to your website are also using strong passwords.
Make it mandatory for your members to create passwords of a specific length, as well as the type of characters that are required to use.
This way, your members will all be creating strong passwords that are not easy to hack.
You can also offer 2-factor authentication (2FA) login methods via SMS or email, by installing plugins. This adds an extra layer of security for all website users and provides a safety net in the event of a password breach.
Step #5: Use parameterised queries
SQL injections are one of the most frequent type website hacks that many sites fall victim to.
As long as your website contains a web form or any other fields that allow users to input information, SQL injections can be executed on your site.
When you leave the parameters of the field too exposed, a hacker can insert malicious code into them and gain access to your database.
A breach in your database can be disastrous because of the amount of private and sensitive customer information that can be stolen by hackers.
Fortunately, there are a number of measures you can take to safeguard your website from SQL injection hacks.
One such method is to implement is the use of parameterised queries. Using parameterised queries ensures that your code has specific enough parameters so that there’s no opportunity for a hacker to mess around with them.
Step #6: Use Content Security Policy (CSP)
Just like SQL injections, cross-site scripting (XSS) attacks are yet another common security threat that site owners have to watch out for.
XSS attacks happen when hackers manage to slip malicious JavaScript code onto your webpage, which can then infect any of your website visitors that are exposed to the code.
To protect your site from XSS attacks, you can also use parameterised queries as you would protect against SQL injections.
You should ensure any code you use on your website for functions or fields that allow input are as explicit as possible in regulating what’s allowed, so you’re not leaving room for anything to slip in.
On top of using parameterised queries to control XSS attacks, another handy tool is the Content Security Policy (CSP).
CSP lets you specify the domains a browser should consider as valid sources of executable scripts when it’s on your site, so the browser knows to ignore any malicious script or malware that may infect your site visitor’s computer.
Using CSP is merely a matter of adding the proper HTTP header to your webpage. This provides a string of directives, telling browsers which domains are okay and which to disregard.
You can find out more about how to craft CSP headers for your website provided by Mozilla here.
Step #7: Restrict your directory and file permissions
This method is going to get slightly technical – but bear with me.
If you look at what websites basically are, they are mainly a series of files and folders that are hosted on your web server.
Other than containing all of the scripts and data needed to make your website work, all of these files and folders are given a set of permissions that control who can read, write, and execute any given file.
On the Linux operating system, permissions are categorised as a three-digit code where each digit is an integer between 0-7.
The first digit signifies permissions for the owner of the file, while the second digit represents permissions for any user group that owns the file, and the third digit represents permissions for everyone else.
The assignations work as follows:
- 4 equals Read
- 2 equals Write
- 1 equals Execute
- 0 equals no permissions for that user
As an example, take the permission code “544.” In this case, a “6” (or “4+1”) in the first position gives the file’s owner the ability to execute the file.
The “4” in the 2nd and 3rd positions represents that both group users and internet users can only read the file, thus preventing any accidental manipulations on the file.
So, a file with “666” (or 4+2 / 4+2 / 4+2) permissions would then be readable and writable by the user, the group and everyone else in the world.
As you can imagine, if all your files can be written and executed by anyone on the web, it becomes much less secured. Instead, you need to restrict permissions and access so that only those authorised to do so have access.
Of course, there are also some valid reasons to open up access to other groups of users. Therefore, a good rule of thumb is to set your permissions like this:
- Folders and directories = 755
- Individual files = 644
To set your file permissions, log in to your cPanel’s File Manager or connect to your server via FTP. Once inside, you’ll see a list of your existing file permissions.
While your web host’s or FTP program’s backend may look slightly different, the basic process for changing permissions remains the same.
Final words
Don’t put off taking this essential step. Start securing your site today, before it’s too late.
Securing your site and understanding how to protect against malicious hackers plays a significant part in keeping your business site safe from harm in the long term.